次に「こんにちは世界!」と画面に表示するための設定と、プログラミングを行います。
設定ファイルの編集
まずは、画面表示に関連する設定ファイルの定義を行います。
Androidアプリケーションにおける画面の表示には、レイアウトと呼ぶ画面の構成やビューと呼ぶ画面の部品の設定を行いますが、その設定にはXMLが用いられます。
つまり、レイアウトとビューを設定するXMLファイルを作成し、画面表示するための設定を行っていくわけです。
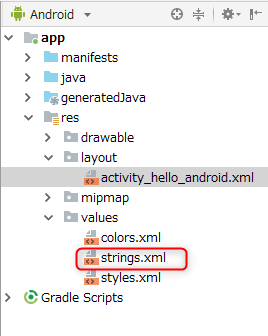
プロジェクトを作成すると、プロジェクトの「res」フォルダの「layout」フォルダの中に「activity_hello_android.xml」というファイルが自動生成されます。
「layout」フォルダは、レイアウトとビューの設定ファイルを保存するフォルダです。
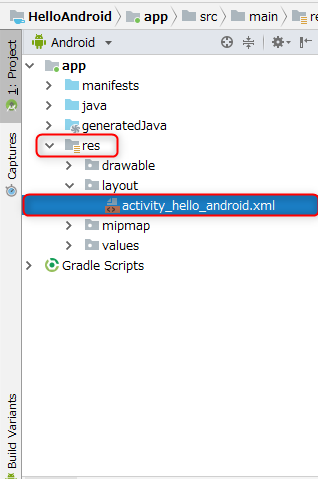
この「activity_hello_android.xml」が最初の画面のレイアウトとビューの設定ファイルになりますので、「こんにちは世界!」を表示するように編集を行います。
Android Studioには、画面作成用に使うグラフィカルな編集ツールがありますが、基本を理解するために、XMLをテキストエディタで記述する方法で説明します。
まず、「activity_hello_android.xml」をクリックして、ファイルを開いてください。
ファイルを開きますと、最初は、編集ツールの画面が表示されますので、エディタの下にある「Text」をクリックします。
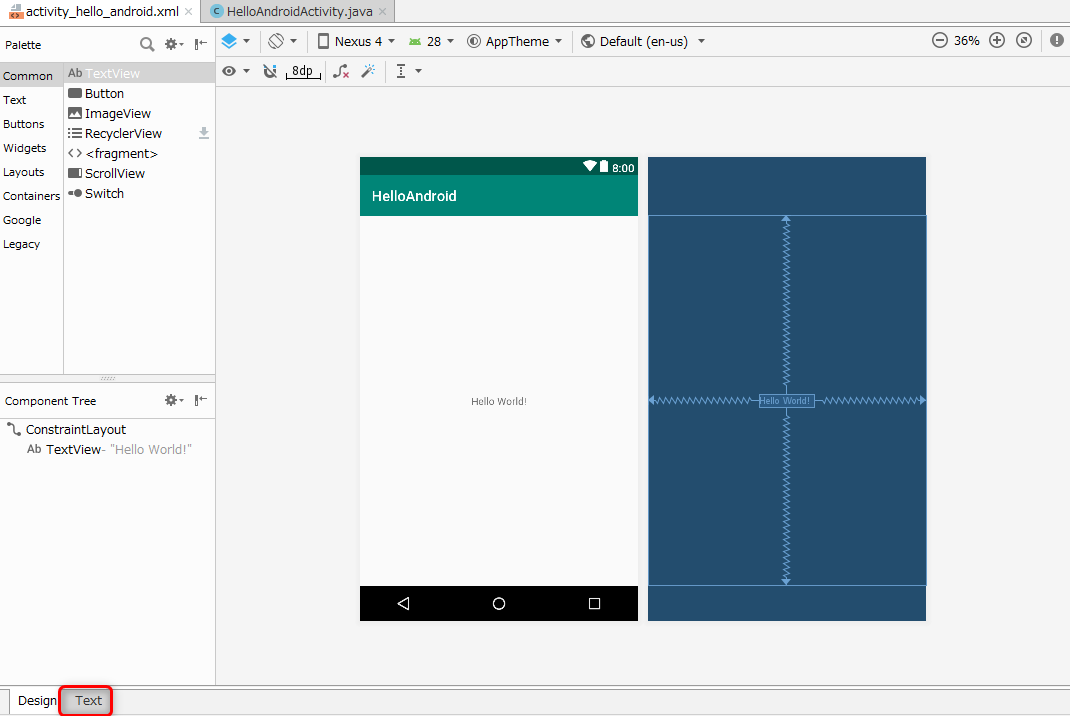
テキストエディタの画面が表示されます。
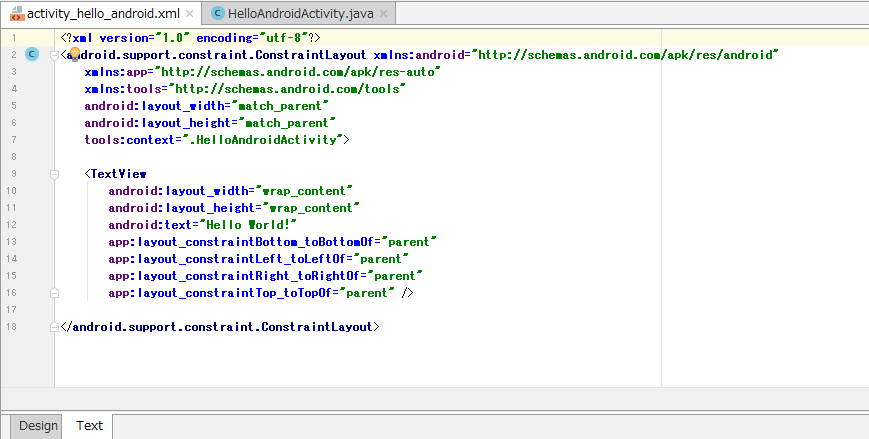
最初に記述されている設定は、以下のとおりです。
リスト 1 activity_hello_android.xml(初期設定)
<?xml version="1.0" encoding="utf-8"?>
<android.support.constraint.ConstraintLayout xmlns:android="http://schemas.android.com/apk/res/android"
    xmlns:app="http://schemas.android.com/apk/res-auto"
    xmlns:tools="http://schemas.android.com/tools"
    android:layout_width="match_parent"
    android:layout_height="match_parent"
    tools:context=".HelloAndroidActivity">

    <TextView
        android:layout_width="wrap_content"
        android:layout_height="wrap_content"
        android:text="Hello World!!"
        app:layout_constraintBottom_toBottomOf="parent"
        app:layout_constraintLeft_toLeftOf="parent"
        app:layout_constraintRight_toRightOf="parent"
        app:layout_constraintTop_toTopOf="parent" />

</android.support.constraint.ConstraintLayout>
設定内容全体を囲むように、<android.support.constraint.ConstraintLayout ・・・></android.support.constraint.ConstraintLayout>というタグがデフォルトで記述されています。
「ConstraintLayout」では、制約(Constraint)という概念を用いて複雑なレイアウトを簡単に作成できます。
2~4行目の「xmlns:android=”http://schemas.android.com/apk/res/android”」、「xmlns:app=”http://schemas.android.com/apk/res-auto”」、「xmlns:tools=”http://schemas.android.com/tools”」は、XMLの名前空間を定義し、設定ファイルで使用するタグや属性が正しく認識されるようにしています。
各レイアウトやビューのタグには、属性を設定することができます。
続く「android:layout_width」と「android:layout_height」は、画面全体でこのレイアウトの横と縦の幅を定義する属性です。
これらの属性に設定している「match_parent」は、画面いっぱいに表示することになります。
「tools:context=”.HelloAndroidActivity”」は、この設定ファイルを制御するアクティビティクラスと呼ばれるクラスを設定します。
<android.support.constraint.ConstraintLayout ・・・></android.support.constraint.ConstraintLayout>タグの中に設定されている<TextView・・・/>タグは、画面に文字列を表示するためのビューの定義です。
またその中にある「android:text」は、表示する文字列を設定するための属性です。表示する文字列は文字列を定義するファイル「strings.xml」に設定します。
「values」フォルダは、長さや幅などの値を設定するファイルや文字列を設定するファイルなどを保存するフォルダです。
「strings.xml」は、「res」フォルダの「values」フォルダに自動生成されています。
「strings.xml」ファイルをクリックして開いてみましょう。
リスト 2 strings.xml(初期設定)
<resources>
    <string name="app_name">HelloAndroid</string>
</resources>
「strings.xml」ファイルに、以下のように行を追加してください。
リスト 3 strings.xml(変更後)
<resources>
    <string name="app_name>HelloAndroid</string>
    <string name="hello_world">こんにちは世界!</string>
</resources>
「string」タグの「name」属性に設定した「hello_world」に対して、「こんにちは世界!」という文字列を設定しています。
後は、レイアウトとビューの設定ファイルで、この文字列を表示するために、「android:text」属性の値を変更します。
リスト 4 activity_hello_android.xml(変更後)
<?xml version="1.0" encoding="utf-8"?>
<android.support.constraint.ConstraintLayout xmlns:android="http://schemas.android.com/apk/res/android"
    xmlns:app="http://schemas.android.com/apk/res-auto"
    xmlns:tools="http://schemas.android.com/tools"
    android:layout_width="match_parent"
    android:layout_height="match_parent"
    tools:context=".HelloAndroidActivity">

    <TextView
        android:layout_width="wrap_content"
        android:layout_height="wrap_content"
        android:text="@string/hello_world"
        app:layout_constraintBottom_toBottomOf="parent"
        app:layout_constraintLeft_toLeftOf="parent"
        app:layout_constraintRight_toRightOf="parent"
        app:layout_constraintTop_toTopOf="parent" />

</android.support.constraint.ConstraintLayout>
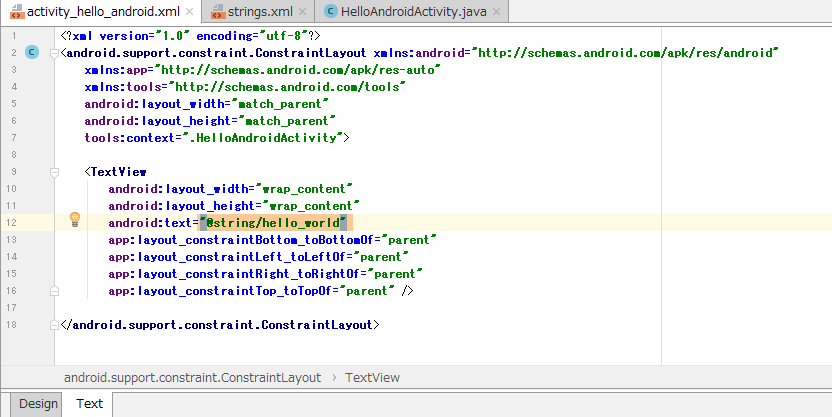
「@string/hello_world」と記述すると、「strings.xml」ファイルの「string」タグの「name」属性に設定した「hello_world」を指定したことになり、「こんにちは世界!」の文字列が表示されるようになります。
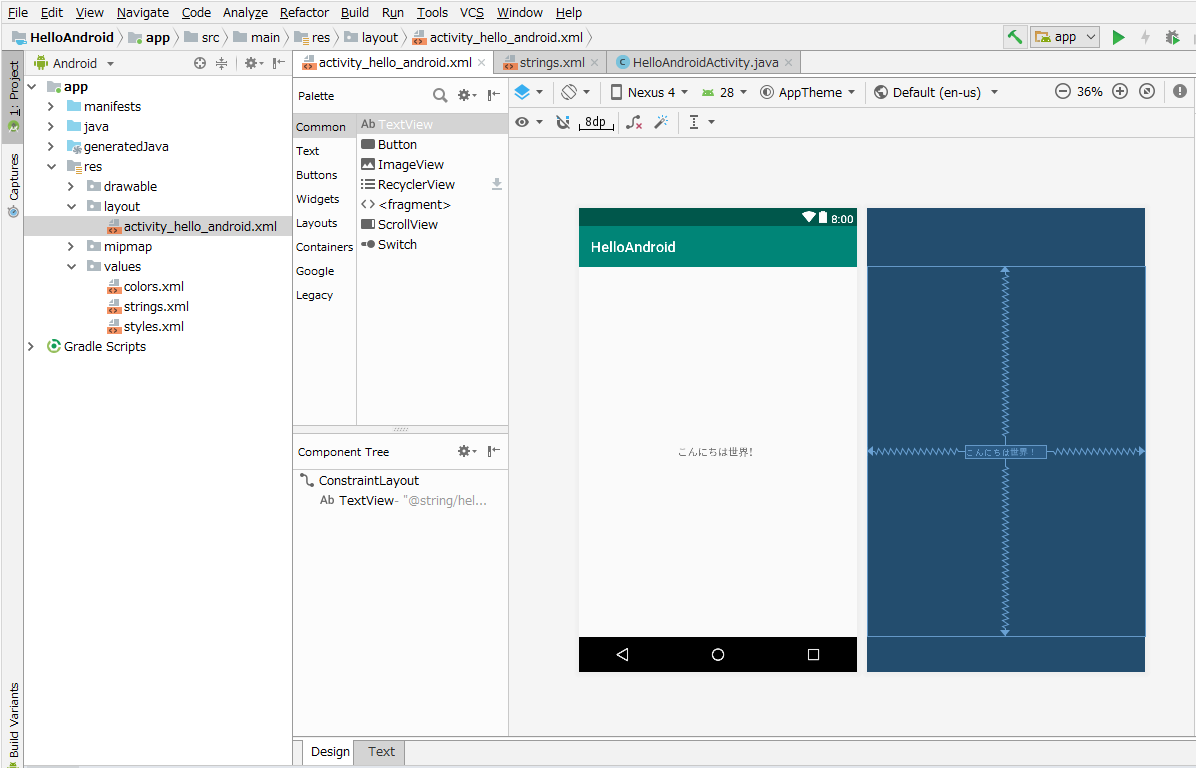
エディタ下のタブで「Design」を確認すると、表示されている文字列が「こんにちは世界!」へと変更されています。
これで、画面表示に関連する定義は完了です。
プログラミング
次に画面を制御するプログラミングを行います。
プロジェクト作成時、「Activity Name:」で指定した名前のJavaプログラムファイル「HelloAndroidActivity」が「java」フォルダの「example.android.helloandroid」パッケージ内に生成されています。
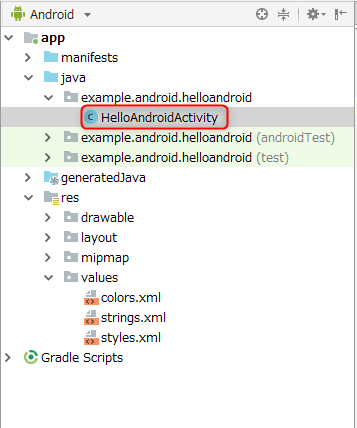
このJavaプログラムファイルに記述されているHelloAndroidActivityクラスが、画面の制御を行うアクティビティクラスになります。
クリックしてファイルを開くと、次のプログラムが記述されています。
リスト 5 HelloAndroidActivity.java
package example.android.helloandroid;

import android.support.v7.app.AppCompatActivity;
import android.os.Bundle;

public class HelloAndroidActivity extends AppCompatActivity {

    @Override
    protected void onCreate(Bundle savedInstanceState) {
        super.onCreate(savedInstanceState);
        setContentView(R.layout.activity_hello_android);
    }
}
自動生成されたクラスは、画面の処理を制御するAppCompatActivityクラスを継承しています。
onCreateメソッドは、アクティビティクラスがインスタンス化される時に自動的に処理されるメソッドです。
画面を初期表示する時に呼ばれますので、レイアウトやビューの設定ファイルを適用するなど、初期表示時に行う処理をこのメソッドに記述します。
このメソッドの中で、スーパークラスAppCompatActivityのonCreateメソッドを呼び出します。
その後に、setContentViewメソッドでレイアウトとビューの設定ファイルを指定します。
最初のアプリケーションでは、このまま実行しますが、画面の処理を追加する場合には、このプログラムを編集することになります。
画面の設定とプログラミングは、これで完了になります。
次は、 アプリケーション実行 です。